Easter weekend was spent out at my grandparents house with some extended family, in addition to most of my immediate family. It was a wonderful weekend full of laughter and comfort food. And hunting Easter eggs. Alexia is 2 1/2 and she loved hunting the eggs!
I decided to go all out for Easter. I made a 14 layer cake, and tulip shaped sugar cookies. For the cake, I used this recipe. Now I'll show you the assembly process.
The recipe calls for 12 layers, but I like the 14 layer look so I just split it between 2 more pans. Once you prepare your batter, prepare your pans. This part of the process is incredibly time consuming, turn on some music or something, you'll be there for awhile. Crisco (or butter) your pans. I use the stuff that comes in stick form and use a spatula to spread it around. Cut out 14 pieces of wax paper, cut to the size of the bottom of the pan. Just staple 14 pieces of wax paper together and then trace the bottom of the pan and cut out. Place a sheet of wax paper in the bottom of the pan and grease it. Then flour the pan.
Whew.
Repeat... 13 more times!
Bake your cakes, checking frequently for doneness. To remove from pan, flip over on top of a cooling rack. The wax paper will be attached to the cake. Carefully peel it off. As long as you have greased it well, it will come off, but it often comes of in many, many pieces.
To assemble the cake, place a cardboard round on a pan with a rack, so there is something to catch the drippings.
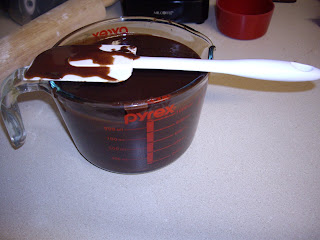
Then place a small amount of frosting on the cardboard, and add a cake layer. Then pour more frosting and add another layer, repeating until all the cake has been used. If you think you are using too much of the frosting you probably aren't, and if you think you are using just the right amount, you could probably use more. This frosting goes a long way.
Now I originally found this recipe on Bakerella's site and she used a dark chocolate buttercream to smooth out the sides and make it look even more beautiful.
So that's what I did, and it MADE the cake. I added Easter malted milk ball eggs around the bottom and a few on the top to make it a bit more festive.
This cake was very moist and very rich. If I make this again, and I probably will, I'll change the ganache recipe a bit, I didn't think it was sweet enough, or something about the flavor was a bit off. I'll definitely keep the dark chocolate buttercream, and I'll probably use it on everything now, I LOVED this frosting. I also have a few ideas on how you could do some variations on this cake:1. Tint each layer and make it a rainbow cake. Then I'd do a white frosting in between each layer for clouds.
2. Tint each layer as a different shade of one color, like a whole spectrum of purple. This would be so pretty!
3. Make the layers chocolate, and the in between frosting peanut butter flavored, with the dark chocolate buttercream... probably incredibly rich, but delicious!
I also made sugar cookies. I found a tulip cookie cutter at Michael's right before Easter and really wanted to use it. This seemed like the perfect occasion. I used this recipe for the cookies.
And I used this recipe for the Royal icing. It wasn't hard to make at all!
Annnnnnnd... I forgot to take a picture of the finished cookie! I'll show you more sugar cookies soon!
Enjoy!
Jamie


No comments:
Post a Comment